On a modern site, each web page typically retrieves data by contacting online services and backends via API. Considering the popularity of the microservices approach, your site is likely to rely on several external APIs.
Calling an API in a Next.js component is simple and takes only a few lines of code. The problem is that the application may end up containing the same logic for making an API call in multiple places. This introduces code duplication issues and makes your codebase less maintainable. With the API layer approach presented in this article, you can address all those downsides.
Suppose we have a layer that contains everything needed to call all the APIs on which the site depends. Encapsulating all the logic for making API calls in the same place would make it easier to update an endpoint string or request behavior. This is the main goal of an API layer.
Let’s find out what a Next.js API layer is, why your site needs one, and how to implement it using the fetch() HTTP client.
What Is an API Layer?
An API layer is the part of your Next.js Application that contains the Programming logic for retrieving data via some Interface (API) on the server. In detail, it centralizes all API calls your server components make to fetch data from external services and backends.
All the logic required to build this architectural layer is encapsulated in the api folder. This consists of several files with the following naming convention:
<externalService>API.js
The <externalService> qualifier facilitates the organization of all APIs that reference the same external service or backend in the same file. Note that a Next.js API layer may also involve some utility and configuration files. These do not follow the naming convention above.
Here is what a sample API layer in a Next.js application may look like:
api
├── configs
│    └── ...
│
├── AuthorAPI.js
.
.
.
├── ProductAPI.js
.
.
.
└── UserAPI.js
Now, you can make an API call in a Next.js server component using the API layer as in the example below:
import { ProductAPI } from "@/api/PokemonAPI"

export default async ProductListComponent() {
  // retrieve the desired data using the API layer
  const products = await ProductAPI.getAll();

  // presenting the product list ...
  return <div>...</div>
}
ProductListComponent is a server component. As such, ProductAPI.getAll() will generate a server-to-server HTTP request that will be performed by the Next.js server at page generation or build time.
Let’s now dig into the reasons why you need an API layer in a Next.js application.
Why Your Next.js Project Needs an API Layer
Adopting an API layer can lead to several benefits in your Next.js architecture. Explore the three most important ones.
1. Avoid code duplication
In a Next.js App Router application, top-level page components usually consist of several server components. These retrieve data to be rendered in the HTML by making requests to API endpoints.
As different server components may need the same data, you end up pasting the following logic pattern calling the same API throughout your codebase:
// the logic required to retrieve all products
// with fetch() via API
const productsResponse = await fetch("https://your-cms.com/api/v1/products");
const productsData = await productsReponse.json();
const products = productsData.results;
Each time you have to retrieve the list of all products from the CMS via API, you will have to repeat those three lines of code. As you can imagine, this approach leads to code duplication.
By encapsulating API calls into reusable functions within API layer files, you can avoid writing boilerplate duplicate code. The three lines of repeated code above will become this more readable and maintainable single line of code:
const products = await CmsAPI.getProducts();2. Centralize all API request logic in the same place
Adopting an API layer enables the centralization of all the logic needed to call APIs in the same place, which has several advantages. For example, suppose the endpoint of an API changes (e.g., from /v1/posts to /v1/articles).
To address that change in the code with an API layer, you would just need to update the endpoint string in the fetch() call inside the specific API function. All API calls referred to that endpoint will now work as desired. This is the main benefit of logic centralization. Without an API layer, you would have to search for all occurrences of the endpoint in your codebase and manually update each one instead. What a tedious and error-prone task!
Also, the centralization offered by the API layer simplifies configuration. This means that if you suddenly need to pass new header values or cookies in some requests, you would only have to modify some API functions accordingly.
3. Deal with data caching easily
Starting with version 13, Next.js comes with a special implementation of the fetch() function from the Fetch API. In addition to all the features fetch() offers in the browser and Node.js, this implementation allows each server-side request to specify its own persistent caching behavior.
In other words, any HTTP request made with the Next.js fetch() function inside server components will produce a result that can be cached on a persistent cache on the server. This cache stores data so that it does not have to be retrieved again on the same request. The server-side caching mechanism leads to reduced network usage, improved page generation time, and improved server response time. Learn more in our guide on how to build a caching layer in Node.js.
By default, Next.js automatically caches the data returned by fetch() requests in the Data Cache on the server. This behavior depends on the optional cache option:
fetch(`https://...`, { cache: "force-cache" | "no-store" })The possible values are:
force-cache: Before making the request, Next.js looks for a matching response in its cache. If there is a match and it is fresh, it returns that data. Otherwise, the server performs the request and updates the cache with the updated response. This is the default value.no-store: Next.js ignores the cache, fetching the resource on every request and not updating the cache with the retrieved content.
Another interesting option is next.revalidate:
fetch(`https://...`, { next: { revalidate: false | 0 | number } })This sets the cache lifetime of a resource. The allowed values are:
false: Cache the resource indefinitely. This is the default value.0: Prevent the resource from being cached.number: Specify the number of seconds the resource should be in the cache.
Find out more about data caching with Next.js in the official documentation.
By implementing the API layer with the Promise-based fetch() HTTP client, you can gain access to all these powerful caching options.
Implement an API Layer in Next.js With fetch
Follow this tutorial section and learn how to build an API layer in a Next.js application based on the App Router. If your Next.js application uses the Pages Router instead, you can follow the same approach we introduced in guide on how to implement a Node.js API layer.
Do not forget that the API layer implemented here will be used to retrieve data when generating pages on the server. To dynamically retrieve data on the frontend, you can integrate your Next.js application with a React API layer.
Time to build an API layer in Next.js using fetch()!
Prerequisites
First, you need a Next.js 13+ application using the App Router approach. You can create one with create-next-app as follows:
npx create-next-app@latestDuring the initialization process, make sure “Yes” to the following question:
Would you like to use App Router? (recommended) » No / Yes
As mentioned before, the Promise-based HTTP client used to implement the Next.js API layer will be the fetch() utility. That function is part of the Next.js core API, so you do not need to install any external dependencies.
Add the API layer to your architecture
Let’s assume that your Next.js App Router project is based on the recommended /src directory. The file structure of your project will be something like this:
└── src
│    └── app
│        ├── favicon.ico
│        ├── globals.css
│        ├── layout.js
│        ├── page.js
│        └── page.module.css
├── public
│   ├── next.svg
│   └── vercel.svg
├──  .eslintrc.json
├──  .gitignore
├──  jsconfig.json
├──  next.config.mjs
├──  package-lock.json
├──  package.json
└──  README.md
Prepare your application to host an API layer by adding an api folder inside /src. The new project structure will be:
└── src
│    └── api
│        └── ...
│    └── app
│        └── ...
.
.
.
The api subdirectory will contain all the logic required to perform server-side API calls in your Next.js application.
Implement the API layer with caching logic
Suppose your Next.js site relies on a headless CMS technology, which exposes public endpoints you need to contact to retrieve the data required to generate web pages on the server or at build time.
You can organize all those endpoints in a cmsAPI.js API layer file inside the api folder as follows:
// src/api/cmsAPI.js

// common variable to use in all API object functions
const baseUrl = "https://your-cms.com/api/v1";
// other common logic...

export const CmsAPI = {
  get: async function (slug, options = undefined) {
    const response = await fetch(`${baseUrl}/article/${slug}`, {
      method: "GET",
      ...options,
    });

    return await response.json();
  },

  getArticles: async function (
    { limit = 10, offset = 0 },
    options = undefined
  ) {
    const queryParams = new URLSearchParams({
      limit: limit,
      offset: offset,
    });

    const response = await cmsClient.request(
      `${baseUrl}/articles?${queryParams}`,
      {
        method: "GET",
        ...options,
      }
    );

    return await response.json();
  },

  getAllDrafts: async function () {
    const response = await cmsClient.request(`${baseUrl}/articles/drafts`, {
      method: "GET",
      ...options,
    });

    return await response.json();
  },

  // other CMS APIs ...
};
This is a real-world example of an <externalService>API.js API layer file. As you can see, it is nothing more than a JavaScript object that exposes functions corresponding to the public endpoints exposed by the CMS. In particular, each object function uses fetch() to contact a specific CMS endpoint and retrieve the desired data.
Notice that each API function accepts an optional options argument. That is required because the Next.js fetch() method supports all the options of the fetch() implementation in the Fetch API. The options argument allows the caller to customize the behavior of the API call as needed, for example by setting custom headers.
As introduced earlier, the Next.js fetch() function also accepts special options for handling the caching behavior. The optionsparameter can also be used to change that as in the following example:
// retrieve the articles from the CMS
// by ignoring the data in the cache
const articles = await CmsAPI.getArticles(
  {
    limit: 20,
    offset: 0,
  },
  {
    cache: "no-store",
  }
);
Since <externalService>API.js files may contain server-only logic—such as basic authentication information—you do not want developers to accidentally use them in React client components.
As a rule of thumb, server components should retrieve data using the Next.js API layer, while client components should communicate with external APIs with an HTTP client like Axios or using a React API layer. Although the Next.js and React API layers serve a similar purpose, they consist of files that have different scopes.
To prevent developers from using the Next.js API layer in client-side React components, install the server-only package. Add it to the project dependencies with the following command:
npm install server-only
Then, mark your <externalService>API.js files as server-only with this line at the top of the files:
import "server-only";

// API layer file definition ...
Now, if a developer imports a <externalService>API.js into a client component, the build process of the Next.js application will fail with the error below:
You're importing a component that needs server-only. That only works in a Server Component which is not supported in the pages/ directory.
Read more: https://nextjs.org/docs/getting-started/
Note that here you saw how to implement a single <externalService>API.js file, but your Next.js API layer can contain many of them.
API layer in action
Time to see the API layer in action in a Next.js demo application that relies on the free and open-to-use PokeAPI project as an external API service provider.
Clone the GitHub repository of the demo project, install the dependencies, and launch the demo site locally with the following commands:
git clone https://github.com/Tonel/api-layer-nextjs
cd api-layer-nextjs
npm install
npm run dev
Visit the https://localhost:3000 page in the browser and you will see:
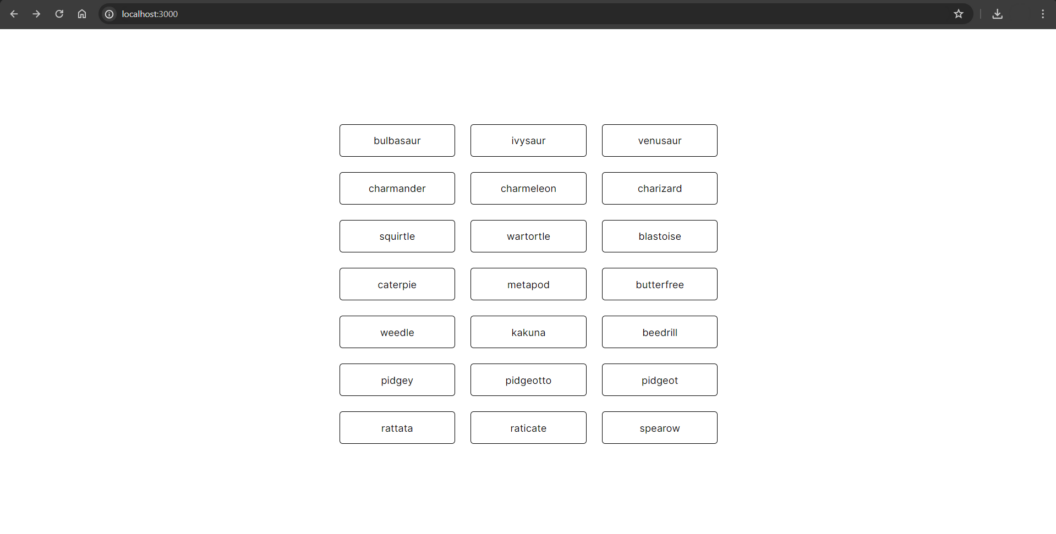
The data presented on this page comes from the GET https://pokeapi.co/api/v2/pokemon?limit=21&offset=0 endpoint.
You can verify that the Next.js fetch() function caches data by default as expected by inspecting the cache folder inside the
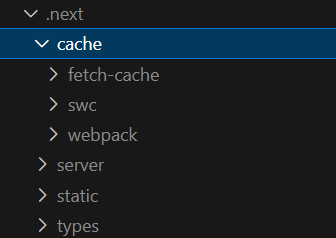
.next build directory:
Open the file inside the fetch-cache subfolder and you will see that it contains a file with hashed data related to the https://pokeapi.co/api/v2/pokemon?limit=21&offset=0 endpoint.
Click on a Pokemon card to reach the detail card page:
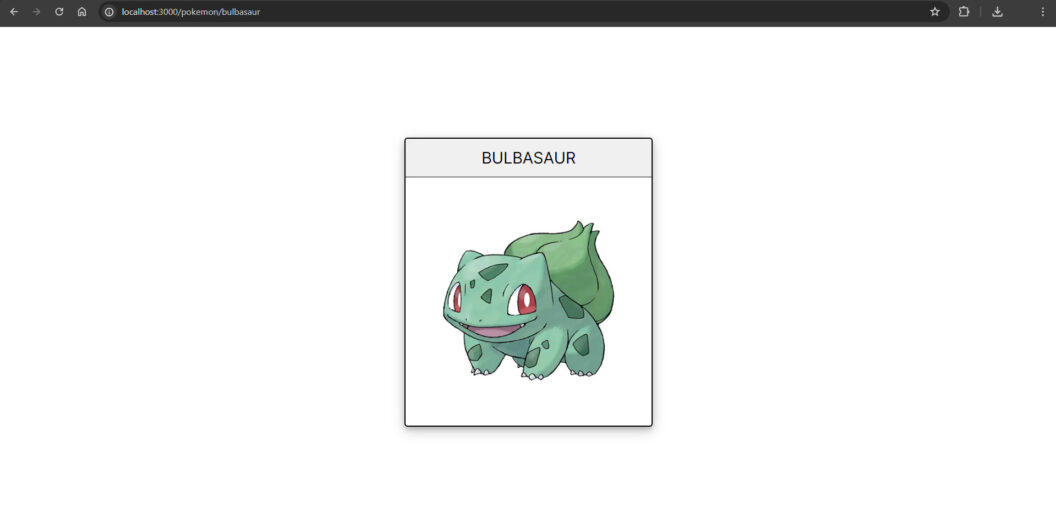
This will trigger a new server-side API call and lead to a new cache file in the .next/cache/fetch-cache folder.
Et voilà! You just learned how to build an API layer in Next.js.
Conclusion
In this article, you understood what a Next.js API layer is, the main benefits it brings to your architecture, and how to implement it using fetch(). An API layer is a set of files that provides everything your server components need to retrieve data via API calls. It centralizes the server-side API logic in your project and makes your codebase easier to maintain. Adding this layer to your Next.js App Router application is easy and does not require external dependencies. You have now learned how to implement a server-side API layer in Next.js and saw it in action through a simple demo.
Want to discuss this article? Join our Discord.