InheritedWidget and Provider State Management
In Flutter development, creating efficient and reusable code is a top priority. Two tools in the Flutter framework that facilitate code reuse and data management are InheritedWidget and the Provider package. These state management techniques enable developers to pass down data and state across the widget tree without the need for excessive boilerplate code. In this article, we will explore InheritedWidget and the Provider package, understand their functionalities, and learn how they can enhance the development process. Let’s dive into the article.
InheritedWidget
InheritedWidget is a tool for managing widget state when multiple widgets require access to the same data. It effectively manages the state of widgets that need to access identical data by passing the data down the widget tree through the use of the context.dependOnInheritedWidgetOfExactType<>() method.
Create an application that uses InheritedWidget
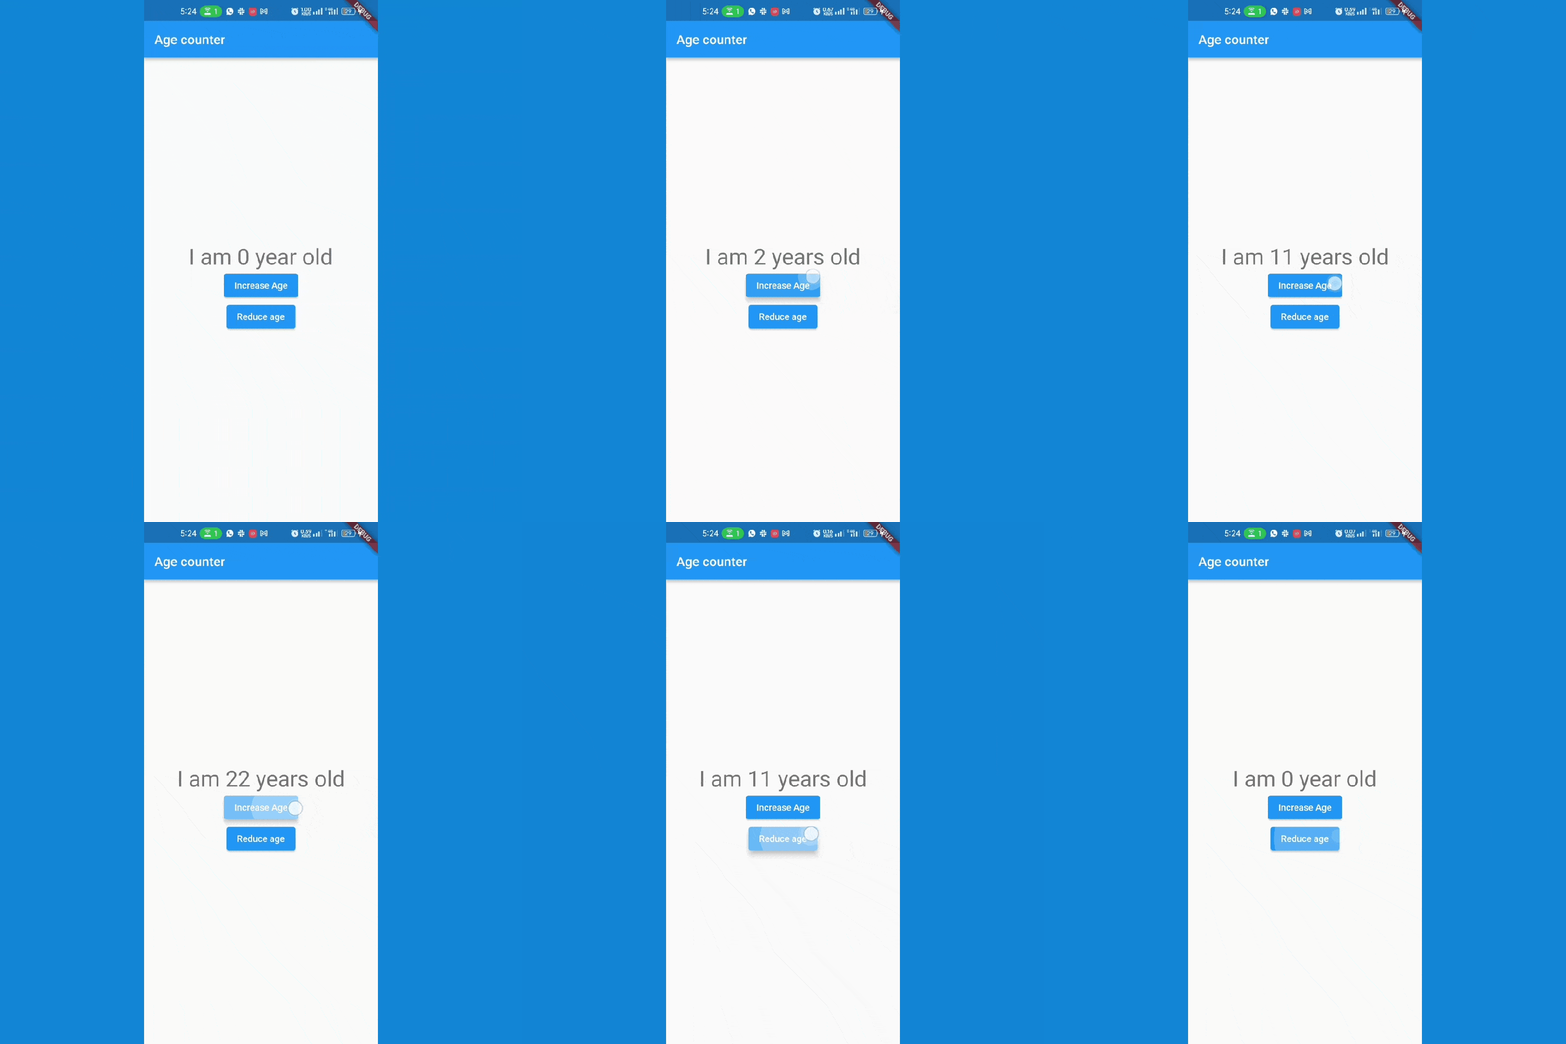
Let’s create a counter app that increases the age when a button is tapped and uses InheritedWidget to manage state.
To use InheritedWidget for state management, we need to create a new class that extends InheritedWidget. This class will hold the state that needs to be shared across the widget tree.
//Create a new class _InheritedCount that extends InheritedWidget.

class _InheritedCount extends InheritedWidget {
  _InheritedCount({Key? key, required this.state, required Widget child})
      : super(key: key, child: child);

  final _CounterState state;

  @override
  bool updateShouldNotify(_InheritedCount old) => true;
}
In this code, we have created a new class called _InheritedCount that extends InheritedWidget. The _InheritedCount class has two properties: count and child. The count property holds the current value of the counter, and the child property holds the child widget.
The next thing we are creating is a class that extends the stateless widget;
This is going to hold our material app widget.
import 'package:flutter/material.dart';

void main() => runApp(MyApp());

class MyApp extends StatelessWidget {
  @override
  Widget build(BuildContext context) {
    return MaterialApp(
      title: 'Inherited Widget  ',
      home: MyHomePage(),
    );
  }
}
MaterialApp is the top-level widget in the app that defines various aspects of the app’s design, such as the app’s title and theme. The MyHomePage class is defined as the app’s home screen. Now we define the CounterWidget class, which is a StatefulWidget.
class CounterWidget extends StatefulWidget {
  CounterWidget({Key? key, required this.child}) : super(key: key);

  final Widget child;

  @override
  _CounterState createState() => _CounterState();
}

class _CounterState extends State<CounterWidget> {
  late int count;

  void incrementCount() {
    setState(() {
      ++count;
    });
  }

   void decrementCount() {
    setState(() {
      --count;
    });
  }

  @override
  void initState() {
    super.initState();
    count = 0;
  }

  @override
  Widget build(BuildContext context) {
    return _InheritedCount(
      state: this,
      child: widget.child,
    );
  }
}
The counterState class has a required child parameter that is used to wrap the app’s content. The build() method returns an instance of _InheritedCount widget, which is a custom InheritedWidget that holds the app’s state.
Now, it’s time to define the _InheritedCount class, which is the custom InheritedWidget we talked about:
class _InheritedCount extends InheritedWidget {
  _InheritedCount({Key? key, required this.state, required Widget child})
      : super(key: key, child: child);

  final _CounterState state;

  @override
  bool updateShouldNotify(_InheritedCount old) => true;
}
The InheritedWidget holds a reference to the _CounterState object, which contains the app’s state, and it also defines an updateShouldNotify() method that determines whether any widgets that depends on this counterState widget needs to be rebuilt when the widget is updated.
It is time for us to use the count value in our HomePage:
class MyHomePage extends StatelessWidget {
  const MyHomePage({super.key});

  Widget build(BuildContext context) {
    return CounterWidget(
      child: Scaffold(
        appBar: AppBar(
          title: const Text("Age counter"),
        ),
        body: Center(
          child: Column(
            mainAxisAlignment: MainAxisAlignment.center,
            children: [
                //Builder widget
              Builder(builder: (context) {
                final inherited =
                    context.dependOnInheritedWidgetOfExactType<_InheritedCount>()
                        as _InheritedCount;
                return Text(
                  inherited.state.count <= 1
                  ? 'I am ${inherited.state.count} year old'
                  : 'I am ${inherited.state.count} years old',
                  style: Theme.of(context).textTheme.headlineMedium,
                );
              }),
              //Builder widget
              Builder(builder: (context) {
                final ancestor =
                    context.findAncestorWidgetOfExactType<_InheritedCount>()
                        as _InheritedCount;
                return ElevatedButton(
                  onPressed: () => ancestor.state.incrementCount(),
                  child: const Text("Increase Age"),
                );
              }),
              //Builder widget
               Builder(builder: (context) {
                final ancestor =
                    context.findAncestorWidgetOfExactType<_InheritedCount>()
                        as _InheritedCount;
                return ElevatedButton(
                  onPressed: () => ancestor.state.decrementCount(),
                  child: const Text("Reduce age"),
                );
              }),
            ],
          ),
        ),
      ),
    );
  }
}
This is the homepage where the UI is going to be changed when the button is clicked. This code is defining a Builder widget, which takes a function as an argument. The function defines how to build the widget, and is called every time the widget needs to be rebuilt.
Inside the function, the code is using context.dependOnInheritedWidgetOfExactType to obtain an instance of _InheritedCount, which is the custom inherited class widget that has been passed down the tree using the InheritedWidget mechanism.
Once the _InheritedCount widget is obtained, the Builder widget returns a Text widget that displays a string indicating the age, based on the count property of the _InheritedCount state. We also want to use a ternary operator to check if the count is less than or equal to 1 and, if so, it displays a singular form of the string. Otherwise, it displays the plural form of the string.
Full Inherited widget code here

Provider package
The Provider package is known for its simplicity, flexibility, and performance benefits. It provides an easy way to manage and share states across the widget tree without requiring a lot of boilerplate code as we saw with InheritedWidget.
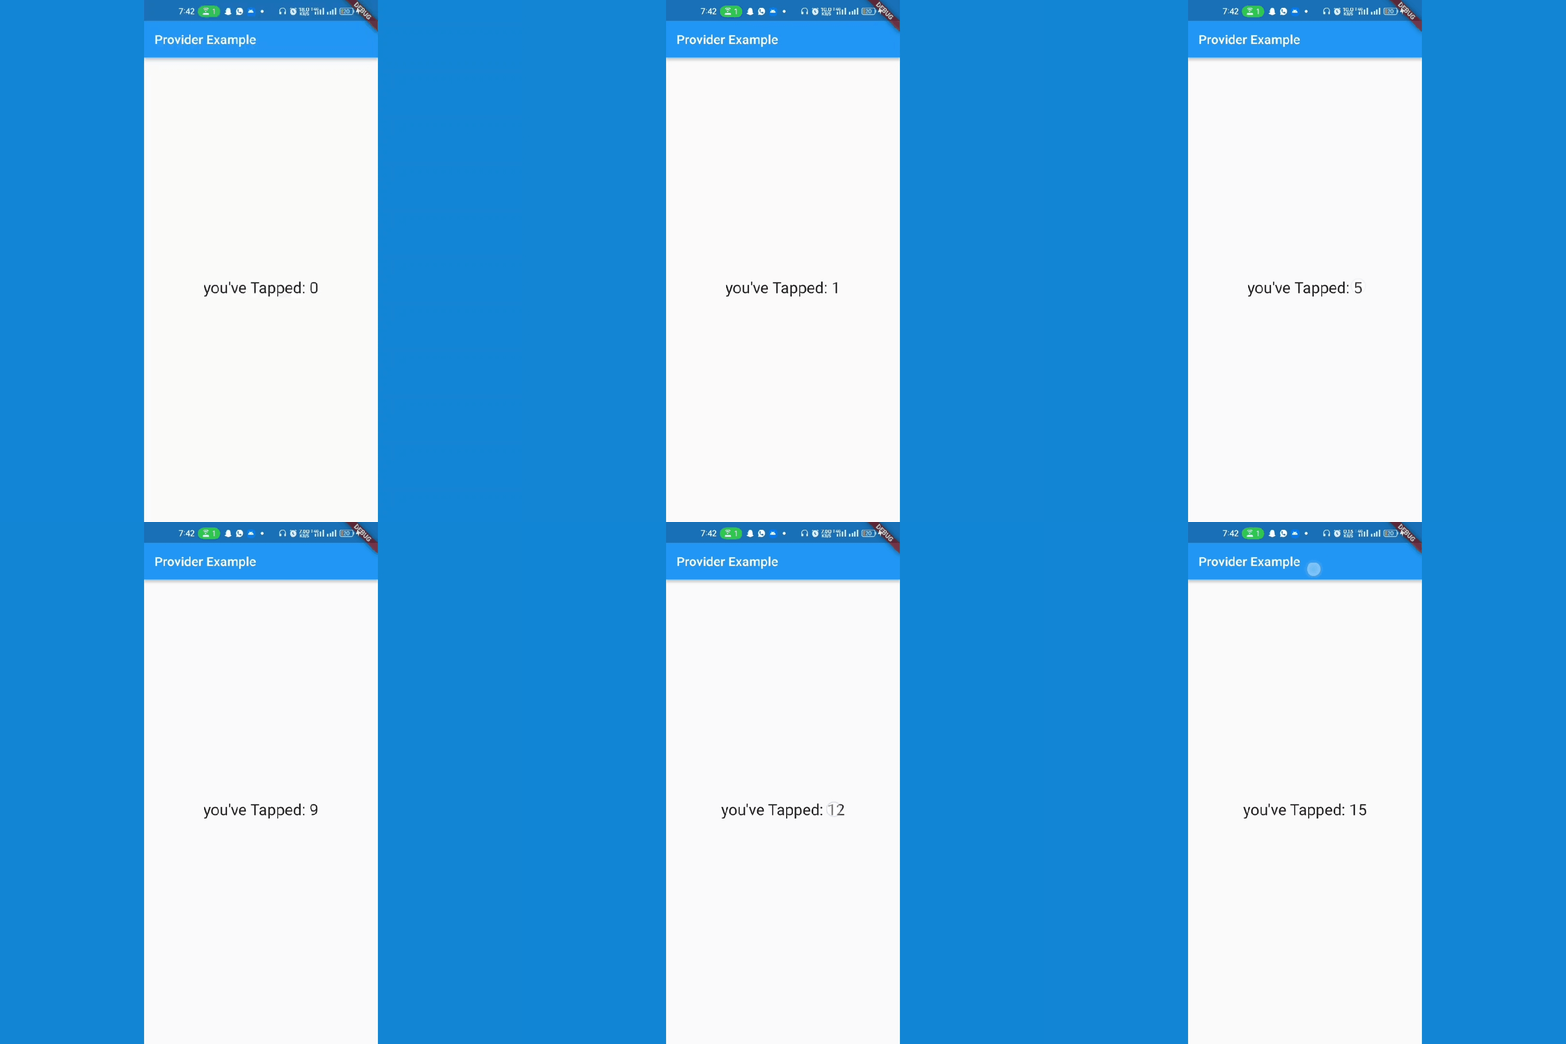
To further understand the provider package, we are going to create an app that also increments its number when clicked.
To use the Provider package for state management, we need to add it to our project’s dependencies.
dependencies:
flutter:
sdk: flutter
provider: ^6.0.5
After adding the Provider package to our project, we can use the Provider widget to provide data to the widget tree.
The next thing to do is to create the CounterModel class with changeNotifier.
// Defining the CounterModel class
class CounterModel with ChangeNotifier {
  int _count = 0;
  int get count => _count;

  void incrementCount() {
    _count++;
    notifyListeners();
  }
}
In the previous code, we created a new class CounterModel that holds the current value of the counter. The incrementCount method is called to update the counter’s value, and it also calls the notifyListeners() method to notify the widgets that depend on this model that the state has changed and they should rebuild.
The notifyListeners() is a method provided by the ChangeNotifier class in Flutter. When it is called, it notifies all the listeners that the object has changed. This means that any widget that is listening to the ChangeNotifier will be rebuilt with the new state of the ChangeNotifier.
To use the CounterModel class in the widget tree, we must wrap it with the ChangeNotifierProvider widget.
// Defining the MyProviderApp class which wraps the MaterialApp widget with the ChangeNotifierProvider widget
class MyProviderApp extends StatefulWidget {
  const MyProviderApp({super.key});

  @override
  State<MyProviderApp> createState() => _MyProviderAppState();
}

class _MyProviderAppState extends State<MyProviderApp> {
  @override
  Widget build(BuildContext context) {
    return ChangeNotifierProvider(
      create: (_) => CounterModel(),
      child: MaterialApp(
        title: 'Provider Example',
        home: ProviderPage(),
      ),
    );
  }
}
The ChangeNotifierProvider is a widget from the Provider package. It is used to provide a ChangeNotifier object to a subtree of widgets, and automatically rebuilds the widgets when the ChangeNotifier object changes.
We have wrapped the MaterialApp widget with the ChangeNotifierProvider widget and we have also provided the CounterModel instance to the create parameter of the ChangeNotifierProvider widget, so now the widgets in the widget tree can listen to the change notifier.
The next thing for us to do is to use the counter value on our provider page.
// Defining the ProviderPage class which displays the current value of the counter and increments it when the user taps on it.
class ProviderPage extends StatefulWidget {
  const ProviderPage({super.key});

  @override
  State<ProviderPage> createState() => _ProviderPageState();
}

class _ProviderPageState extends State<ProviderPage> {
  @override
  Widget build(BuildContext context) {
// Retrieving the current value of the counter from the CounterModel

    return Scaffold(
      appBar: AppBar(
        title: Text('Provider Example'),
      ),
      body: Consumer<CounterModel>(
        builder: (context, CounterModel, child) => Center(
          child: GestureDetector(
            onTap: () {
              // Incrementing the counter value
              CounterModel.incrementCount();
            },
            child: Text(
              'you\'ve Tapped: ${CounterModel._count}', // Displaying the current value of the counter
              style: TextStyle(fontSize: 24.0),
            ),
          ),
        ),
      ),
    );
  }
}
What we did here is that we retrieved the current value of the counter from the CounterModel using the context.watch().count method. When the user taps on the number on the screen, the counter value is incremented by calling the context.read().incrementCount() method and then the widget listens to check if changes have been made in the state and, if changes have been made, it changes the UI instantly.
full provider package code here .

Conclusion
The InheritedWidget package provides a powerful inheritance mechanism, allowing data to propagate down the tree efficiently. On the other hand, the Provider package builds upon InheritedWidget, offering a simple and flexible approach to managing state in Flutter applications.
These state management techniques offer a streamlined and elegant solution for code reuse and state management. So you should explore the vast capabilities of InheritedWidget and Provider packages for yourself!
Thank you for reading Part 2 of this series on understanding state management in Flutter. We hope you found the information useful .
If you’re interested in diving deeper into this topic, check out parts one and three.
In Part 1, we explore the stateful widget and what you should take into consideration when choosing a state management technique. We discuss the lifecycle of a stateful widget, setState and we use the stateful widget to build a counter app . You can read it here: Understanding State Management in Flutter (Part 1).
In Part 3, we conclude the series by discussing some additional state management solutions available in the Flutter ecosystem. We explore alternatives like BLoC and Redux and we provide insights into their strengths and use cases. you can read it here: Understanding State Management in Flutter (Part 3).
Want to discuss this article? Join our Discord.
