Introduction
Services are important in any complex Angular architecture. They allow our code to share common functionality across our application. In this article, we’ll explore how to use a test-driven development (TDD) approach to incorporate services into our Angular applications.
Prerequisites
Before starting this article, it is assumed that you have:
- An understanding of Angular 2,
- Knowledge of TypeScript and how it relates to JavaScript,
- An understanding of ES6/ES2015 concepts such as arrow functions, modules, classes, and block-scoped variables,
- Comprehension of using command line or terminal such as Git Bash, iTerm, or your operating system’s built-in terminal,
- Node >= v4 and NPM >= v3 installed while knowing how to run NPM scripts, and
- A setup capable of unit testing Angular 2 applications. If you could use some help with this, see our tutorials on Setting Up Angular 2 with Webpack and Testing Components in Angular 2 with Jasmine.
The Sample Project
In previous tutorials, we began developing an application which dynamically generates and displays forms. The application could only handle the hard-coded form, defined in the main AppComponent, which leaves room for significant improvement.
Cloning the Repository
If you’d like to view the final code for this article, it’s available in this GitHub repository. It can be downloaded by going to your terminal/shell and entering:
git clone https://github.com/gonzofish/semaphore-ng2-webpackOnce cloned, switch to this article’s final code by typing:
git checkout servicesTo see the code from our previous article on components, enter:
git checkout componentsOnce you have the code checked out, make sure to run:
npm iTo install all of the dependencies.
Continuing from Existing Code
If you have existing code, it’s a good idea to update your dependencies before diving in. To do so, from the root of your code run:
npm upDepending on your version of Node and NPM you may receive warnings, but all the dependencies should be working.
Moving to Services
Services can do a lot for an application. They can act as a go-between to allow disparate parts of our code like our components to talk to each other. They also give our code the ability to access common functionality without the need to reimplement the functionality everywhere.
Our form-generation application could benefit from two services:
RestServicewhich handles retrieval of the list of forms from an external sourceFormServicewhich contains the functions for working with that data
Our First Service
We’ll start by creating the FormService. As previously stated, this service will contain the functionality for working with an array of forms. It will have three functions:
setForms(newForms: Array<FormData>)which allows us to set the array of forms to usegetAllForms()which returns the array of formsgetForm(formId: number)which returns a form with anidmatchingformId
A New Model
Looking at the list of functions, you may notice a new type called FormData. This type needs to be defined before we move on. To do so, add a file named form-data.model.ts to the models directory under src. Add the following in the file :
import { Question } from './question.model';

export interface FormData {
    id: number;
    questions: Array<Question>;
    title: string;
}
Our new model will have a numeric id, an array of Question objects, and a string title. Everything is fairly straightforward here, but you’ll notice that we import the Question model to use it in the FormData definition.
Also, there should be a file index.ts under the models directory. Add the following line to it:
export * from './form-data.model';This will give us easy access to our models by other parts of our application. This technique is known as a “barrel“.
Testing the Service
We’ve already got a hold on what functions the service is going to provide, which gives a good start. Before we can code, though, we need to add services directory under the src directory.
cd src

mkdir services
Inside that directory, create two files form.service.ts and form.service.spec.ts. As with our components, the .spec.ts file will contain all of our test code and the plain .ts file will contain our application code.
Since we’re doing TDD, let’s begin with the .spec.ts file.
import { FormService } from './form.service';
import { FormData } from '../models';

describe('Service: FormService', () => {
});
We need to use the FormService and FormData for our tests, so we import both of them.
// ...imports

describe('Service: FormService', () => {
    const testForms: Array<FormData> = [
        {
            id: 2,
            questions: [
                {
                    controlType: 'radio',
                    id: 'like',
                    label: 'Do you like pizza?',
                    options: [
                        { label: 'Yes', value: 1 },
                        { label: 'Of Course', value: 2 }
                    ],
                    required: true
                },
                {
                    controlType: 'text',
                    id: 'toppings',
                    label: 'What toppings do you like?',
                    required: false
                }
            ],
            title: 'Pizza Party'
        },
        {
            id: 5,
            questions: [
                {
                    controlType: 'select',
                    id: 'delicious',
                    label: 'What is the best cheese for a burger?',
                    options: [
                        { label: '', value: 'no-cheese' },
                        { label: 'American', value: 'american' },
                        { label: 'Cheddar', value: 'cheddar' },
                        { label: 'Provolone', value: 'provolone' },
                        { label: 'Swiss', value: 'swiss' }
                    ],
                    required: true
                },
                {
                    controlType: 'textarea',
                    id: 'perfection',
                    label: 'Describe your perfect burger:',
                    required: true
                }
            ],
            title: 'Burger Bonanza'
        }
    ];
    let service: FormService;
});
Next, we declare two variables. The first one is an array of forms which is the test data we’ll be using. The second variable is going to hold the instance of our class.
It is worth mentioning that the test data doesn’t need to be 100% realistic. What is important is that we’re providing data structures that are what we expect to see. Although the above data is very thorough, we could also have just created a couple of FormData objects with no questions or very simple ones. It’s not the data that matters, only that when given a certain input, our methods return the expected output.
describe('Service: FormService', () => {
    // ...variable declarations

    beforeEach(() => {
        service = new FormService();
    });
});
Here, we just create a new instance of our FormService, something which is normally handled by Angular in a live application.
Something you may have noticed so far is that we haven’t pulled in a single Angular resource. That’s one of the nice things about services – they’re not necessarily Angular-specific. However, when using something like the HTTP module, as we’ll see in a bit with our RestService, we’ll need to depend on Angular for some functionality.
// ...beforeEach

    it('#getAllForms should, by default, return an empty array', () => {
        expect(service.getAllForms()).toEqual([]);
    });
Now, for our first test. By default, the list of forms should be an empty array. If we run this test, we’ll get a big failure because there’s no application code. Let’s add that.
import { FormData } from '../models';import { FormData } from '../models';
We import the FormData model since that’s what our array of forms will be.
// ...imports

export class FormService {
    private forms: Array<FormData> = [];
}
Next, we declare the class we’re exporting and a private variable to hold the list of forms, set to an empty array.
    // ...class variables

    getAllForms() {
        return this.forms;
    }
Then, we add our method which just returns that private variable. If we execute our tests now, we should see that they are green.
We don’t want to return an empty array forever. We want to be able to set our forms. This may feel a bit odd, but we’re going to create two tests now, one for our getAllForms method and another for the setForms method. We do this because the only way to verify that setForms works is to also test that getAllForms returns the right value.
In form.service.spec.ts, we add the following test:
    // ...getAllForms test

    it('#setForms should set the forms attribute', () => {
        service.setForms(testForms);

        expect(service.getAllForms()).toEqual(forms);
    });
Again, we see the test has failed because the setForms method does not exit.
    // ...class variables

    setForms(newForms: Array<FormData>) {
        this.forms = newForms;
    }

    // ...getAllForms
We’re not writing complex code here, but it should be illustrating the point of how to unit test services. We’re simply asking for a set of new forms, and then we set our service’s forms variable to it. Now when getAllForms is called, it will return whatever we’ve set forms to. As such, our tests should be green again.
We have one last method to create and test – the getForm method. This method will just return a form that matches the provided formId parameter. Let’s add that test.
    // ...setForms test

    describe('#getForm', () => {
        beforeEach(() => {
            service.setForms(testForms);
        });

        it('should return the form matching the provided ID', () => {
            expect(service.getForm(5)).toEqual(testForms[1]);
            expect(service.getForm(2)).toEqual(testForms[0]);
        });
    });
The tests for getForm will always call setForms as a first step to ensure our service’s forms variable has values in the array. This first test calls the getForm service with 2 different values – 5 and 2. If you look at the test data, you’ll see that the first entry has an ID of 2 and the second has an ID of 5. The test verifies that when we search for those values we get the corresponding form.
Here is the corresponding application code:
    // ...getAllForms

    getForm(formId: number): FormData {
        return this.forms.find((form) => form.id === formId);
    }
Our getForm method leverages the ES2015 Array.prototype.find method. This method takes a function and returns the first element in the array for which the provided function returns true. In our case, we return the first FormData to match.
However, what should we do if we don’t find a form corresponding to the provided ID? By default, Array.prototype.find returns undefined if it does not find its value. We’re going to return null instead.
        // ...first getForm test

        it('should return null if it does NOT find a form matching the provided ID', () => {
            expect(service.getForm(1)).toBeNull();
            expect(service.getForm(null)).toBeNull();
            expect(service.getForm()).toBeNull();
        });
We test that passing in a variety of values that we know will not find FormData, and return our expected null output.
The application code that satisfies this is:
    // ...getAllForms

    getForm(formId: number): FormData {
        let form = this.forms.find((form) => form.id === formId);

        if (!form) {
            form = null;
        }

        return form;
    }
You’ll see that we created a form variable which we assign the result of the .find call. If form is falsy, we set it to null. Finally, we return form.
If we run our tests, we should see all green. You’ve successfully unit tested your first Angular 2 service.
Incorporating the Service into Our Application
Up until now, with our service, we haven’t really relied on any code that is Angular-specific. But to incorporate it into our application, we’ll need to add Angular-specific code.
First, we’ll make it so that other parts of our code can utilize dependency injection to access our class. In form.service.ts, add the following:
import { Injectable } from '@angular/core';     // added
import { FormData } from '../models';

@Injectable()                                   // added
export class FormService {
    // ...class code
}
We’ve pulled in Angular’s Injectable decorator. We then decorate our service’s class with Injectable, so that Angular sees if our service has any dependencies. At the moment we don’t have any, but it is good practice to decorate our services with Injectable. Note that the @ symbol and parentheses on @Injectable() are required.
Next, we’ll incorporate it into our AppComponent from the previous tutorial. First, we’ll need to pull in both the FormService and the FormData model. This component is located at src/components/app/app.component.ts.
import { Component } from '@angular/core';

import { FormService } from '../../services/form.service';
import { FormData, Question } from '../../models';
Next, we’ll need to get rid of the questions variable and create a form variable on our AppComponent:
// ...imports

@Component({
    // ...metadata
})
export class AppComponent {
    form: FormData;

    // ...constructor
}
We’ll use the previous tutorial’s form questions to set the forms of the FormService when the AppComponent loads. Then, we’ll select that form using the getForm method of FormService.
    constructor(private formService: FormService) {
        formService.setForms([
            {
                id: 1,
                questions: [
                    // ...previous tutorial's questions
                ],
                title: 'Pizza Perfection'
            }
        ]);
        this.form = formService.getForm(1);
    }
This may feel a bit silly right now, using the service to set the forms with data we already have in our component, but when we get to our RestService, this will make more sense.
Still, if we loaded this application in a browser, it would fail. That would happen because Angular doesn’t recognize the service yet. To make it do so, we need to declare our service as a provider in our AppModule. The AppModule is defined in src/app.module.ts. We add the following code:
// ...Angular imports

import { FormService } from './services/form.service';

// ...component imports

@NgModule({
    // ...existing metadata
    providers: [ FormService ]
})
export class AppModule() {}
We import our service and then declare it in the metadata of NgModule. This lets Angular know we want this to be available to all parts of our application.
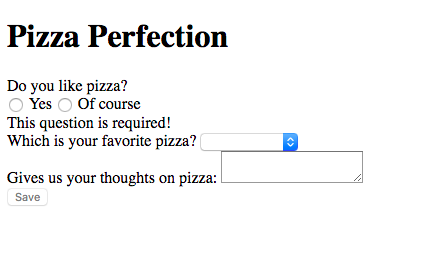
Now, if we run our application in a browser using
npm startand we navigate to http://localhost:9000/webpack-dev-server/ (don’t forget the last slash), we’ll see the following:
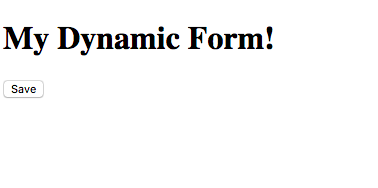
However, that’s not right. We haven’t updated the template of the AppComponent to use the new form. Let’s do that now, open app.component.html under src/components/app and change it to the following:
<h1>{{ form.title }}</h1>

<dynamic-form [questions]="form.questions"></dynamic-form>
We’ve replaced the static header with the title from our new form and replaced the previous questions with form.questions. If we save and reload the page, we should see it working:
We’ve now fully incorporated our service into our application.
We’re still using a single form to accomplish this. It’d be better if we could pull a real list of forms from an external source and select which form to display. Let’s do that by creating our RestService.
The Rest
The RestService is going to lean on Angular a bit more since we’ll be using the @angular/http library to retrieve data from our external source. We’ll worry about what that source is later and, for now, use TDD to build out our service.
Testing the Service
To properly run tests that utilize HTTP, we’re going to need to intercept the HTTP calls. Why? Well, first, think of the increased time it would take to call an external source during testing — we definitely don’t want that.
Second, in the unit tests we’ve written this far, we’ve made sure that we only test exactly the code we care about; an external source is out of our control and, thus, not our concern. What is our concern is that we react accordingly when given a certain input from that source.
Lastly, if we depended on an external source, there’s no guarantee that it will be available at test time. If it wasn’t available, our test would fail regardless of whether or not our code was right.
Luckily, Angular provides us with some capabilities to intercept HTTP calls. We’ll first need to install Angular’s HTTP library. Open up a shell/terminal, navigate to the root of your code and run the following command:
npm i -S @angular/httpOne of the nice architecture decisions of Angular 2 is that you don’t need all of Angular to get the base functionality, as was the case with Angular 1. This means that we can only pull in libraries when needed, like with the HTTP library.
Be forewarned, testing an HTTP service is much more complicated than a plain service. We’ll be using RxJS to handle the HTTP calls, and the testing setup is more complex. That being said, let’s do it.
Add two files to src/services: rest.service.ts and rest.service.spec.ts. Open up the .spec.ts file and add the following:
import {
    async,
    getTestBed,
    TestBed
} from '@angular/core/testing';
Here, we’re pulling in some core testing functionality. The async function is a wrapper. It finishes execution when every asynchronous call in it completes. We’ll use it to ensure our test configuration and all its dependencies get created before we run any tests.
The TestBed and getTestBed functions work in tandem. TestBed has methods for us to configure our testing environment. Once we’ve set it all up, getTestBed allows us to access parts of the application. Again, we’ll see this in action in a moment.
// ...core testing imports
import {
    BaseRequestOptions,
    Http,
    Response,
    ResponseOptions,
    XHRBackend
} from '@angular/http';
Next, we import a bunch of stuff from Angular’s HTTP module. We’ll see how each of these imports contribute to our code in a second. Although it is not used in our tests, we pull in XHRBackend so that other libraries which need it can make use of it.
// ...http imports
import {
    MockBackend,
    MockConnection
} from '@angular/http/testing';
Then, we import Angular’s utilities for mocking interaction with an HTTP source. MockBackend lets us create a fake server and MockConnection gives us the ability to intercept connections to that fake server.
// ...http testing imports

import { RestService } from './rest.service';
import { FormData } from '../models';
The last of our imports pull in the RestService and the FormData model so that we can use them in our tests.
// ...import

describe('Service: RestService', () => {
    let backend: MockBackend;
    let service: RestService;
});
Like in our previous tests, we declare our describe for the tests. We then declare two variables we’ll be using in our tests — the mock backend and our RestService instance.
    // ...testing variables

    beforeEach(async(() => {
        TestBed.configureTestingModule({
            providers: [
                BaseRequestOptions,
                MockBackend,
                RestService,
                {
                    deps: [
                        MockBackend,
                        BaseRequestOptions
                    ],
                    provide: Http,
                    useFactory: (backend: XHRBackend, defaultOptions: BaseRequestOptions) => {
                        return new Http(backend, defaultOptions);
                    }
                }
            ]
        });
    }));
Here’s where things start getting more interesting. This is a big block of code, so let’s take an in-depth look at it.
    beforeEach(async(() => {
    }));
As with previous tests, we have a beforeEach. We’re also calling on async to wrap our setup code. As stated before, we do this to ensure that everything in our setup is resolved before we try to run a test.
        TestBed.configureTestingModule({
            // ...module metadata
        });
We also utilize this method in component testing to perform setup for our tests. This allows us to declare declarations, imports, providers, and other module metadata as part of our tests without needing to pull in our entire application.
            providers: [
                BaseRequestOptions,
                MockBackend,
                RestService,
                {
                    deps: [
                        MockBackend,
                        BaseRequestOptions
                    ],
                    provide: Http,
                    useFactory: (backend: MockBackend, defaultOptions: BaseRequestOptions) => {
                        return new Http(backend, defaultOptions);
                    }
                }
            ]
Next, we declare the different provided services our service will need to make use of. BaseRequestOptions is a default setup for making an HTTP request. It can be extended to alter how HTTP requests are made — you can read more about it in the Angular API documentation.
MockBackend is used to create a fake backend. We need it to track the HTTP requests our service will make. Our RestService is also set up as a provider, so that we can make sure it gets set up properly.
The last provider is a bit more complicated. What we’re doing here is taking the existing Http module and ensuring it uses MockBackend to make HTTP requests in place of the XHRBackend that is normally used. We also set up default request options to use BaseRequestOptions.
This object is saying that we are providing the Http class, but that Angular should use the provided factory function (useFactory) to create instances of Http, and that it depends on MockBackend and BaseRequestOptions, so Angular should use its dependency injection to pull those dependencies in first.
Now that we understand how the setup occurs, we can proceed.
        // ...configureTestingModule

        const testbed = getTestBed();
        backend = testbed.get(MockBackend);
        service = testbed.get(RestService);
Here, we just get a hold of our test bed, using getTestBed, and then get the instances of our fake backend, which is an instance of MockBackend, and our rest service, which is an instance of RestService. We do this so that we can utilize them for our tests.
    // ...beforeEach

    function setupConnections(backend: MockBackend, options: any) {
        backend.connections.subscribe((connection: MockConnection) => {
            if (connection.request.url === 'api/forms') {
                const responseOptions = new ResponseOptions(options);
                const response = new Response(responseOptions);

                connection.mockRespond(response);
            }
        });
    }
We create a utility function that allows us to establish how our fake server will respond. It uses the backend’s connection, which is a type of MockConnection and subscribes to it. This means that when any connection from our backend gets a request, run the function passed into .subscribe.
Whenever we make a request to api/forms in our unit tests, we’ll create a fake response with the provided options and mock out the response.
    // ...setupConnections

    it('should return the list of forms from the server on success', () => {
        setupConnections(backend, {
            body: [
                {
                    id: 1,
                    questions: [],
                    title: 'Pizza'
                },
                {
                    id: 4,
                    questions: [],
                    title: 'Burrito'
                },
                {
                    id: 2,
                    questions: [],
                    title: 'Cheeseburger'
                }
            ],
            status: 200
        });

        service.getForms().subscribe((data: FormData[]) => {
            expect(data.length).toBe(3);
            expect(data[0].title).toBe('Pizza');
            expect(data[1].title).toBe('Burrito');
            expect(data[2].title).toBe('Cheeseburger');
        });
    });
In this test, we set up our connection to return an array of forms and a successful status code. We then call the getForms method of RestService and subscribe to the RxJS Observable it returns. When the observable succeeds, we test that we get all 3 forms back.
If we run our tests, we’ll see big failures. Of course, this is because we haven’t written a line of application code, so let’s do that. Open up rest.service.ts and let’s write some application code.
import { Injectable } from '@angular/core';
import {
    Http,
    Response
} from '@angular/http';
First, we import Injectable from Angular’s core library, like we did for the FormService. We also pull in Http and Response from Angular’s http library which we’ll put to use.
// ...Angular imports

import { Observable } from 'rxjs/Observable';
import 'rxjs/add/operator/map';
Next, we pull in some RxJS dependencies. The first is the Observable which we’ve mentioned before. We also pull in the map operator. The importing of RxJS operators is a bit different than we’ve seen before. This is because we don’t need explicit use of anything exported from those libraries. What we actually need is to ensure that the code for those operators is pulled in, so we can use them with the Observable class.
// ...RxJS imports

import { FormData } from '../models';
Lastly, we import our FormData model.
// ...imports

@Injectable()
export class RestService {
    constructor(private http: Http) {}
}
We then create our RestService class, decorating it to be Injectable. We create our constructor to create a private class variable named http that is of type Http. Declaring it this way allows us access to http by using this.http throughout RestService.
    // ...RestService constructor

    getForms() {
        return this.http.get('api/forms')
                .map((response) => response.json() as FormData[]);
    }
Now, we’ll deal with our getForms method. Here we use http to execute a GET to the URL 'api/forms'. When that GET responds successfully, we’ll use the RxJS map operator to turn the response into JSON and then convert the JSON to an array of FormData.
If we run our tests now, everything should come up green.
If the server fails, we can take care of such failures using the RxJS catch operator. First, we write the test.
    // ...success test

    it('should log an error to the console on error', () => {
        setupConnections(backend, {
            body: { error: I'm afraid I've got some bad news! },
            status: 500
        });
        spyOn(console, 'error');

        service.getForms().subscribe(null, () => {
            expect(console.error).toHaveBeenCalledWith(I'm afraid I've got some bad news!);
        });
    });
This test sets the connection to respond with a JSON error message and a status code of 500. Note that other than being JSON, there is nothing standard about how the JSON is constructed — it isn’t as if Angular or RxJS require us to use an error attribute on the JSON.
Next, we spy on console.error, because that is where we will output the error message the server returns. This does two things: it makes sure that calling console.error won’t output anything, and when console.error is called, we can see what it was called with.
Lastly, we call getForms and, instead of subscribing to successful calls, we use the second parameter subscribe, which subscribes to unssuccessful calls. When this error function hits, we make sure that console.erro was called with the error message returned from our faux server.
Add the following application code to rest.service.ts to satisfy this test:
    // ...RestService constructor

    getForms() {
        return this.http.get('api/forms')
                .map((response) => {
                    if (response.ok) {
                        return response.json() as FormData[];
                    } else {
                        return this.logError(response);
                    }
                });
    }

    private logError(error: any) {
        try {
            error = error.json();
            console.error(error.error);
        } catch(e) {
            // ...ignore
            console.error(error);
        }

        return Observable.throw(error);
    }
We update our getForms method so that when a response comes in, we see if it is “ok” — meaning a success status code and reacting accordingly. If it is a successful status code, we do as we did before, transforming the response JSON into FormData and sending it on.
If it fails, we call our new logError method. This method takes in any value. It then tries to convert that object to JSON and, if it can, calls console.error with the error attribute. If it can’t convert to JSON, it calls console.error with the passed-in value.
The last thing we do is use Observable to throw the error. We do that by passing it on to error state subscribers, such as our unit test.
When we run our tests again, we should see them all succeeding. We now have almost complete RestService with unit tests.
The External Data Source
All that’s left is to incorporate the RestService into our application. However, first we need an external data source.
Where is this external source? Most web applications have some server that they talk to. Since we don’t necessarily have that luxury, we’ll use a library called angular-in-memory-web-api to simulate a web server. This library is maintained by members of the Angular 2 documentation team and is used in the official Angular 2 tutorial. To do this we need to create a service which will return an array of FormData. Since this faux web server is outside the scope of the article, if you’d like to know more about it, you can checkout the version in the repo for this article. The name of the service is FauxFormsService.
Note to also look at the AppModule to see how the InMemoryWebApiModule is used for our sample application.
Incorporating the HTTP Service
Once the external service is set up we need to start using it in our application. To do that, we’ll need to update the AppModule, AppComponent, and DynamicFormComponent to accomodate changes to our application.
Let’s start with the AppModule.
Changes to AppModule
There only two real changes to our AppModule. The first is that we need to pull in the HttpModule from @angular/http and add it as an import. The second change is that we need to add our RestService as a provider.
Open up src/app.module.ts.
// ...other Angular imports
import { HttpModule } from '@angular/http';

// ...FormService import
import { RestService } from './services/rest.service';

// ...component imports

@NgModule({
    bootstrap: [ AppComponent ],
    declarations: [ /* ...previously imported components */],
    imports: [
        // ...previously imported modules
        HttpModule
    ],
    providers: [ FormService, RestService ]     // added RestService
})
export class AppModule {}
As you can see, we import the HttpModule and RestService. Then we add them to the appropriate metadata attributes —imports for HttpModule and providers for RestService.
Changes to AppComponent
The AppComponent gets a couple of changes. Open up src/components/app/app.component.ts and edit it accordingly.
// ...previous imports
import { RestService } from '../../services/rest.service';

// ...component decorator
export class AppComponent {
    forms: FormData[] = null;
    selectedForm: FormData = null;

    constructor(private formService: FormService, restService: RestService) {
        restService.getForms().subscribe((forms: FormData[]) => {
            this.formService.setForms(forms);
            this.forms = this.formService.getAllForms();
        });
    }

    selectForm(formId: number) {
        this.selectedForm = this.formService.getForm(formId);
    }
}
What’s been done here is that we, first, pull in the rest service. We’ve now replaced our form variable with two variables. The first is forms (with an “s”) that will hold the array of FormData we get from the RestService. The second is selectedForm which is a replacement for form (without an “s”). When the user selects a form to display, we’ll grab that form and set selectedForm to the grabbed form.
Next, we declare a restService parameter, in the constructor. This variable is not used in any other spot in our class, so we do not assign a private or public keyword on it.
In the constructor, we make a call to restService.getForms and subscribe to it, as we did in our RestService tests. When the subscription succeeds, the FormService is first called to set the list of forms, and then called to get that list back. We do this to ensure that our component and FormService are in sync.
Lastly, we have added a public selectForm method to the component. This is the method the UI will call when a form is selected by the user. It calls the getForm method of the FormService and assigns the return value to our component’s selectedForm variable.
Next, we make updates to the template of AppComponent. Open up src/components/app/app.component.html and update accordingly.
<table border="1" cellpadding="2" cellspacing="0" style="width: 40%">
<thead>
<tr>
<th>Title</th>
<th>Questions</th>
<th> </th>
</tr>
</thead>
<tbody>
<tr *ngFor="let form of forms">
<td>{{ form.title }}</td>
<td>{{ form.questions.length }}</td>
<td>
<button (click)="selectForm(form.id)">Display</button>
</td>
</tr>
</tbody>
</table>
<span *ngIf="!!selectedForm">
<hr>
<h1>{{ selectedForm.title }}</h1>
<dynamic-form [questions]="selectedForm.questions"></dynamic-form>
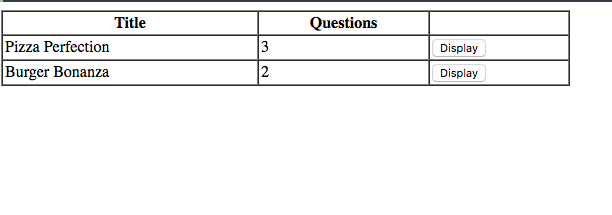
</span>What’s most noticeable is that we’ve added a <table> to our app component. This table is used to display a list of forms the user can select. In the <tbody> we use ngFor to loop through the forms variable of AppComponent and use each item in the array as a row of data. The title and number of fields of each form are accompanied by a button which allows users to select that form for display.
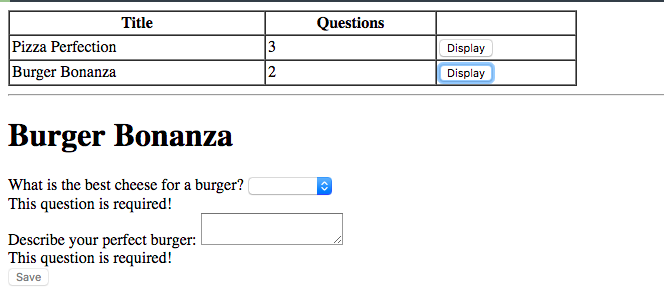
The form display from before has been updated to only display when selectedForm has an actual form to display. Additionally, the previous form variable has been replaced with selectedForm. We also added an <hr> element to visually separate the list from the form.
Changes to DynamicFormComponent
The DynamicFormComponent now just needs to watch for changes to the set of questions it has. Previously, on initialization of the component, each question was transformed from a Question model into a FormControl. Now, whenever the set of questions changes, we perform the same action. This makes it so that as the user selects forms to display, the set of questions changes properly as well.
Open up src/components/dynamic-form/dynamic-form.component.ts and do the following updates:
import {
    Component,
    Input,
    OnChanges               // swapped OnInit for OnChanges
} from '@angular/core';
// ...other imports

// ...component decorator
export class DynamicFormComponent implements OnChanges {    // swapped OnInit for OnChanges
    // variable declarations

    ngOnChanges() {         // swapped ngOnInit for ngOnChanges
        this.formGroup = this.generateForm(this.questions || []);
        this.payload = '';
    }

    // ...other ethods
}
We just swap our OnInit for OnChanges in various spots. This is all good, but now our tests, which relied on calling ngOnInit will fail. So let’s update them as well.
Open up src/components/dynamic-form/dynamic-form.component.spec.ts to perfom the following changes:
// ...imports & describe

    // ...beforeEach, & 1st test

    it('should create a FormGroup', () => {
        component.ngOnChanges();        // swapped ngOnInit for ngOnChanges
        expect(component.formGroup instanceof FormGroup).toBe(true);
    });

    it('should create a FormControl for each question', () => {
        // ...questions setup
        component.ngOnChanges();        // swapped ngOnInit for ngOnChanges

        // ...rest of test
    });

    it('should set the payload to a stringified version of our form values', () => {
        // ...questions setup
        component.ngOnChanges();        // swapped ngOnInit for ngOnChanges

        // ...rest of test
    });
If we run our tests now, we should see all green.
Run the Application
Now, we need to see this application in action. To do so, open a shell/terminal and run:
npm startThen navigate your browser to http://localhost:9000/webpack-dev-server/.
You should see something similar to:
If you click the “Display” button, you should see something as:
Our application is now complete.
Continuous Testing
As always, we’re not really done testing until we’ve incorporated it into our continuous integration service. We’ll use Semaphore for continuous integration.
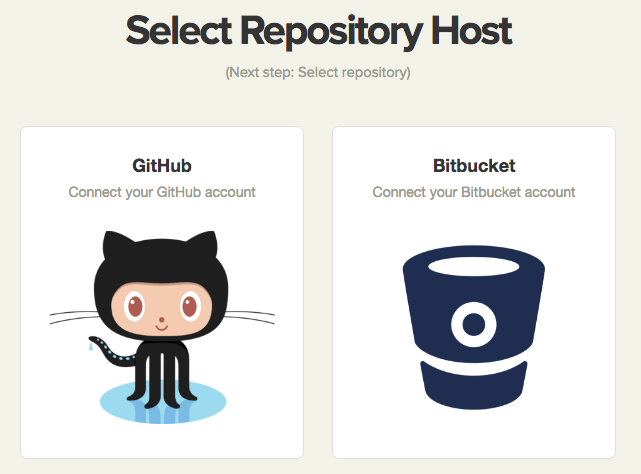
If you haven’t done so already, push your code to a repository on either GitHub or Bitbucket.
Once our code is committed to a repository, we can add a CI step to our Angular 2 development without much effort.
- You’ll be prompted to select an organization. Just select your account:

- Next, if you haven’t already, select either Github or Bitbucket, depending on where your repository lives:
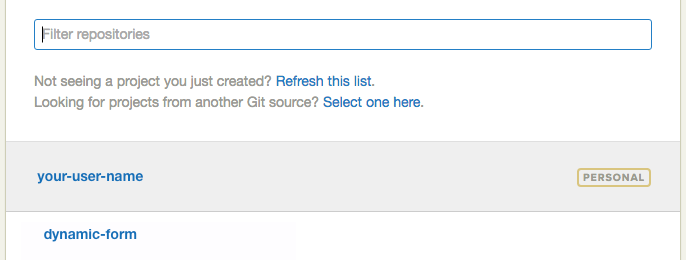
- Then, from the provided list, select the project repository:
- Next, select the branch (most likely “master”),
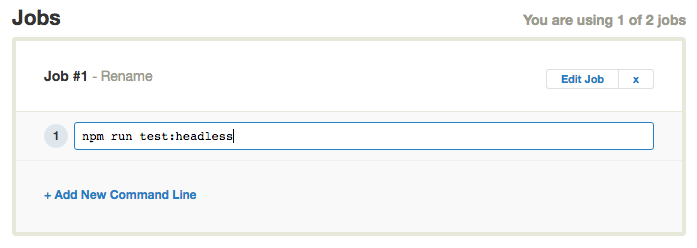
- Once Semaphore completes analysis of your project, update the job to
npm run test:headless,
- Click “Build with These Settings” and it’s building.

From now on, any time you push code to your repository, Semaphore will start building it, making testing and deploying your code continuously fast and simple.
Conclusion
This article took an in-depth look at how to construct simple services, as well as those that incorporate asynchronous HTTP requests. Building upon the previous article’s codebase, we updated an application that displayed a single, dynamic form into one that could retrieve a list of forms from a server, display those forms, let a user select a form, and display that form out.
There are still changes that can be made, we could incorporate routing so that we have a view of just the list of forms and a view of just one selected form. We could utilize our services better so that the DynamicFormComponent uses the FormService to get information about the form instead of passing them from the AppComponent.
If you have questions or comments, as always, feel free to leave them in the comments below.
Thanks for reading!
Want to discuss this article? Join our Discord.