AWS App Runner is a service for people just wanting to run their containers without hassles. In this post, we’ll learn how to use this far-simpler-than-ECS-and-Fargate alternative, explore how it fares against its competitors and, of course, how to continuously deploy software with Semaphore.
Is App Runner the right solution for running your containerized applications?
What is App Runner
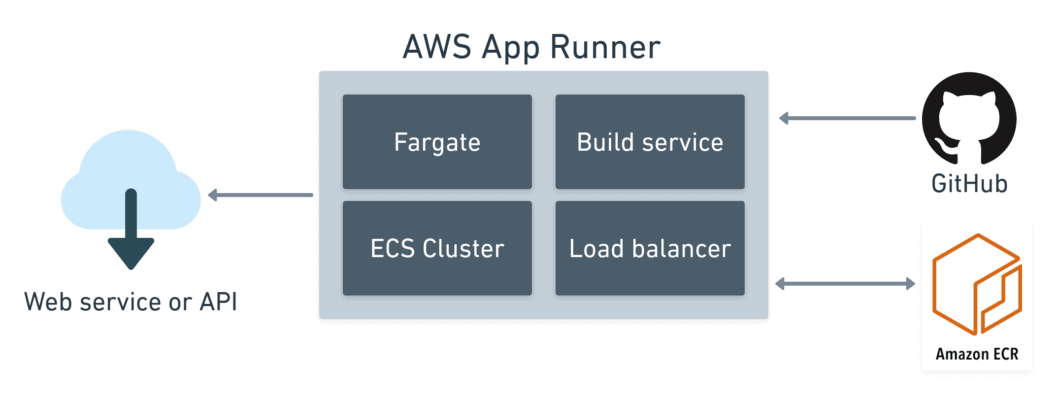
Introduced in May 2021, AWS App Runner is a managed container service for the cloud. Its principal use cases are web applications and APIs. Like its cousins, DigitalOcean App Platform, Heroku, or Google Cloud Run, AWS doesn’t want you worrying about scaling or infrastructure while using their service.
Behind the scenes, App Runner runs on Amazon ECS Cluster and Fargate to execute your containers. But you don’t need to know anything about either of those services to use App Runner.
App Runner Features
AWS has put a lot of effort into making things easy for developers, especially for small-scale projects that don’t need beefy infrastructure. It has:
- Simple autoscaling: instances are started and stopped as demand changes, between configurable min and max limits.
- Load balancing: the service includes a transparent, non-configurable load balancer.
- SSL enabled: you get HTTPS endpoints for all your applications with AWS-managed certificates. You don’t need to issue or renew certificates.
- Build service: you can push your own images or let AWS build them for you from code.
- Persistent URLs: the service assigns randomly-generated URLs for each environment. You can optionally map them to domains of your own.
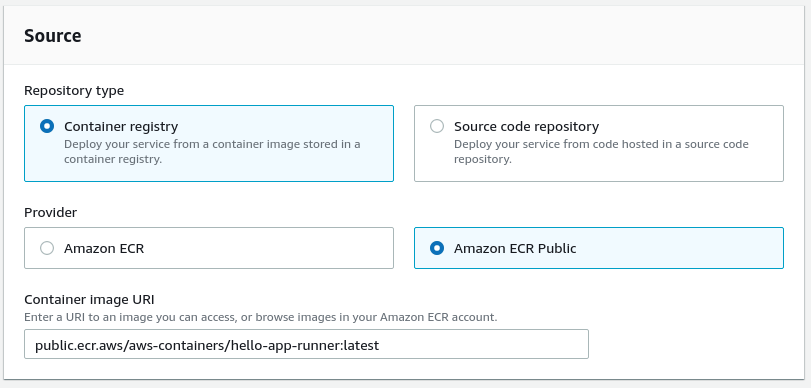
App Runner can run in two modes. In build mode, AWS pulls code from GitHub and builds the application on every change. In container mode, it deploys Docker-compatible images from public or private AWS ECR registries.
The build mode sounds great, until you realize that only Python and Node.js runtimes are supported (you can request more language on the App Runner roadmap). In addition, AWS charges a per-build fee. Given these limitations, we’ll ignore this mode for the moment and instead use Semaphore CI/CD to build the images.
App Runner vs. other container offerings
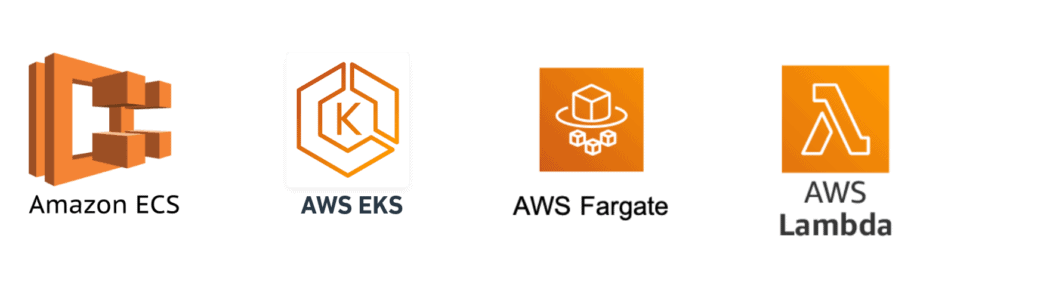
Compared to AWS Lambda, App Runner doesn’t lock you in the Amazon ecosystem, as generated images will work with all cloud providers. Resource-wise, App Runner gives you more to work with. You can use up to 2 vCPUs and 4 GB of memory. There are no request time limits.
App Runner runs on top of AWS ECS and Fargate. Compared to them, App Runner is a lot easier to get into, but you lose some of the more fine-grained configuration options. Also, cost estimation for App Runner is far simpler — AWS changes a fixed CPU and Memory fee per second.
Like all other services, containers are temporary. You can add persistence by connecting your containers with S3, DynamoDB, or relational databases in AWS RDS.
Amazon EKS is a whole different beast. It’s a managed Kubernetes service that you can grow into when you find that you need more advanced features like networking or combining multiple containers. You can learn all about Docker and Kubernetes with our free ebook: CI/CD for Docker and Kubernetes.
Unlike Google Cloud Run, you cannot scale App Runner instances down to zero; you’ll have to pay for at least one instance while the service is active. You can, however, pause the service at any time to stop charges.
Run your application with AWS App Runner
Apart from an AWS account, you’ll need a few things to configure a new service on AWS App Runner.
- A Semaphore account to set up CI/CD.
- The latest release of copilot, AWS official tool for managing containers. You’ll also need the AWS Command Line Interface.
- Docker Desktop or the Docker CLI to build the first image.
- Git and a GitHub account, which you will use to fork and clone this hello-world example repository.
Setting up a new App Runner application is a three-step process:
- Initialize the application.
- Create production environment.
- Build and push the image to ECR.
Running copilot init creates the application and one service endpoint on port 8080. We’ll call the application “hello” and the service “web”.
$ copilot init \
     --type "Request-Driven Web Service" \
     --app hello \
     --name web \
     --port 8080 \
     --dockerfile Dockerfile
This command will only work if you have already executed aws configure at least once before.
When done, copilot asks if you want to create a test environment. If you say yes, it will build and push a Docker image on the spot. We can skip this step for now.
Now let’s create a production environment with copilot env init. The environment includes:
- Public and private subnets.
- An ECS cluster with default settings.
- All IAM roles needed to access the resources.
$ copilot env init    \
    --profile default \
    --default-config  \
    --app hello       \
    --name production --prod

✔ Created environment production in region us-east-2 under application hello.
The last step is to build the Docker image and publish it:
$ copilot svc deploy \
--app hello \
--env production \
--name web
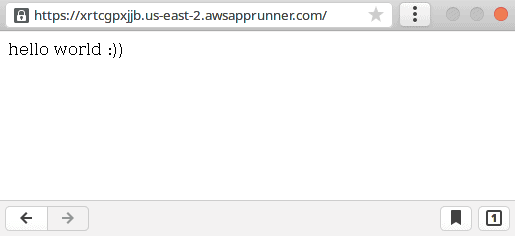
✔ Deployed web, you can access it at https://xrtcgpxjjb.us-east-2.awsapprunner.com.The build takes around 15 minutes. Once done, copilot will output an SSL-enabled URL of the endpoint.
Copilot has created a folder with the application manifests. Check it in the repository.
$ git add copilot
$ git commit -m "configure App Runner"
$ git push origin main
When you’re finished trying out App Runner, you can delete the application and all endpoints in it with copilot app delete.
Enabling Continuous Deployment
The example application is online. The next step is configuring continuous deployment. Before we can do that, however, you need to enable ECR monitoring in App Runner.
Log into the AWS App Runner console and select the recently created application.

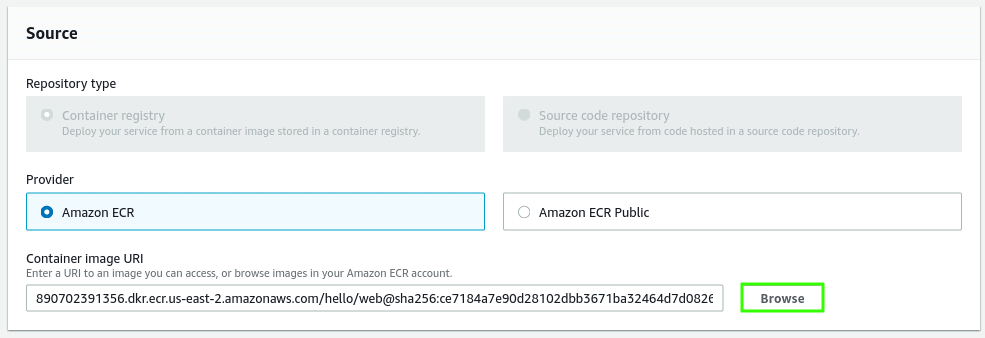
Click on the configuration tab and then on edit. The service is called with the pattern: APP_NAME-ENV_NAME-SERVICE_NAME

Click on browse next to the container URI address.
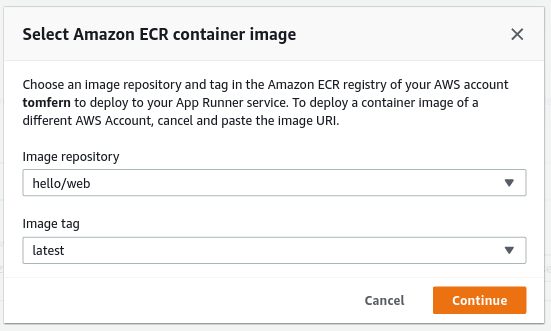
Select the application’s ECR registry and the latest tag.
Next, change the deployment trigger from manual to automatic.
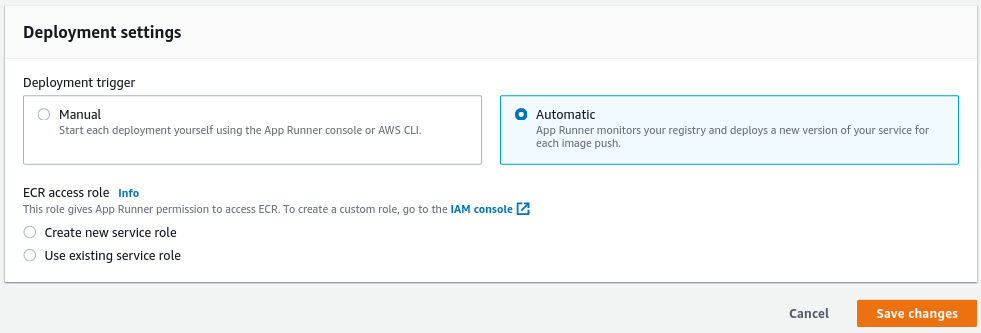
Click on save changes to complete this step. Wait until App Runner finishes redeploying the image.
Creating a CI/CD pipeline
We must now build the Docker image and push it into ECR.
Log in with your Semaphore account and open the settings menu.
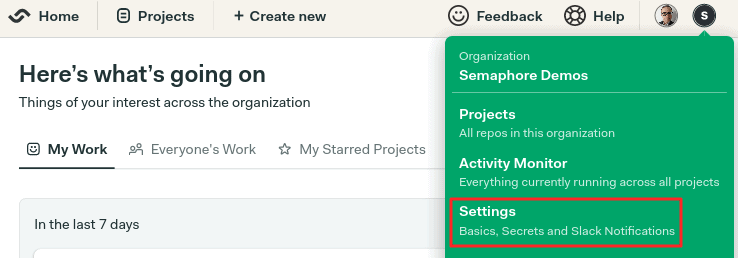
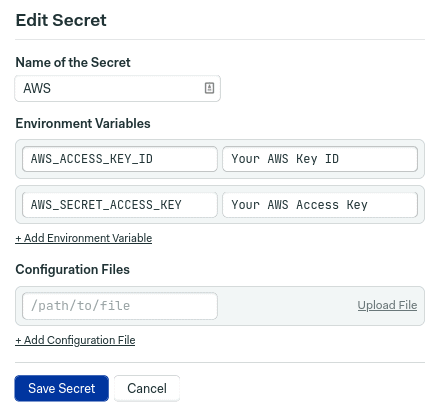
Go to Secrets and click on new secret. Add your AWS account programmatic access keys. You can find or create them in your IAM console.
Creating a project
Next, click on + create new near the left top corner. This will generate a new continuous integration pipeline.
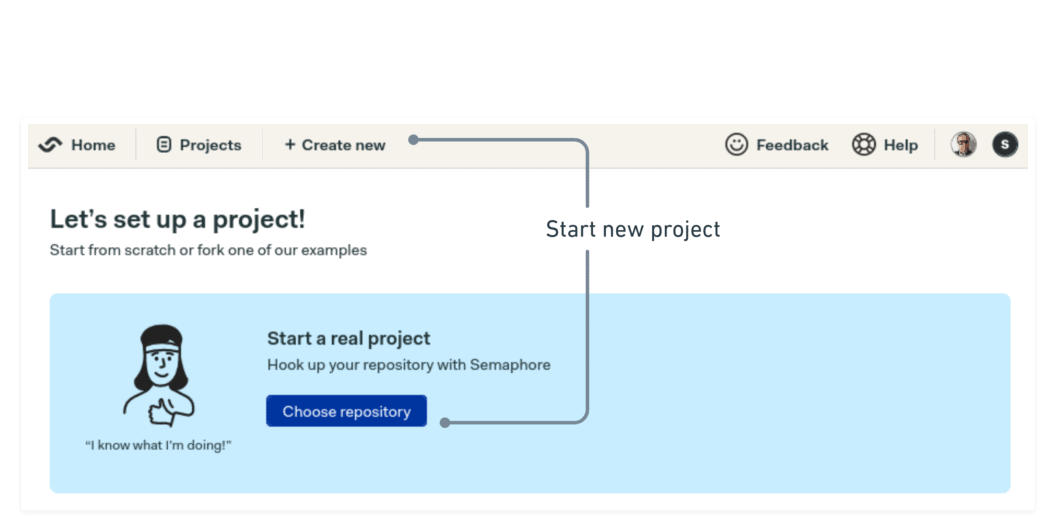
Semaphore is now showing your code repositories.
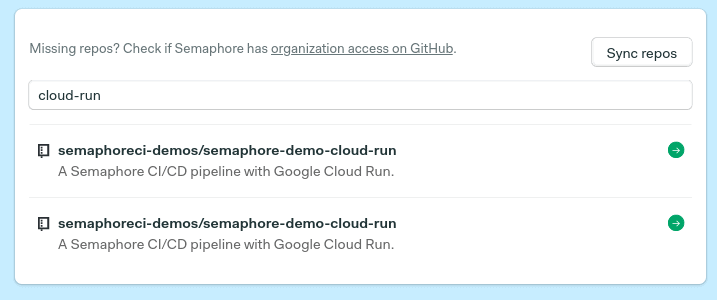
After choosing the demo repository, you’ll land on a page that lets you add people to the project.

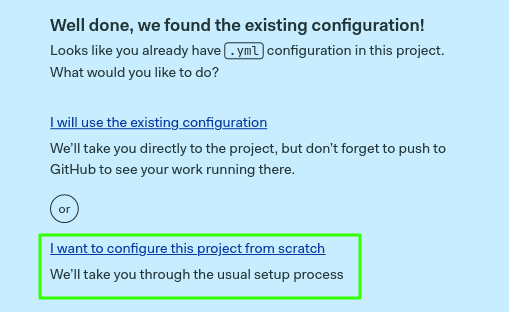
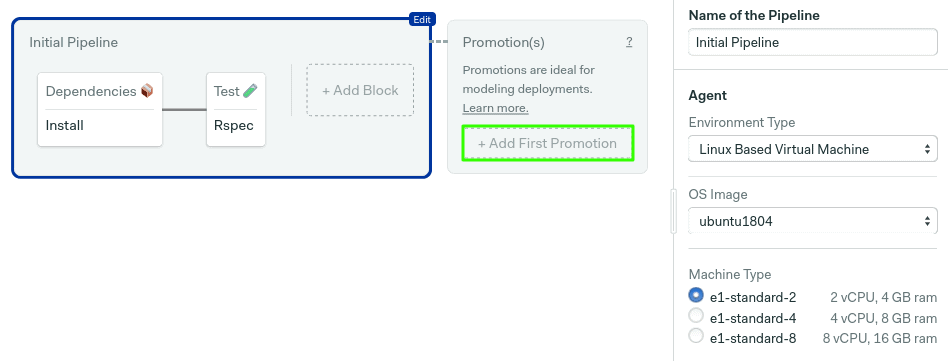
Select “start from scratch” to configure a pipeline from zero.
Finally, select “single job” and click on customize.
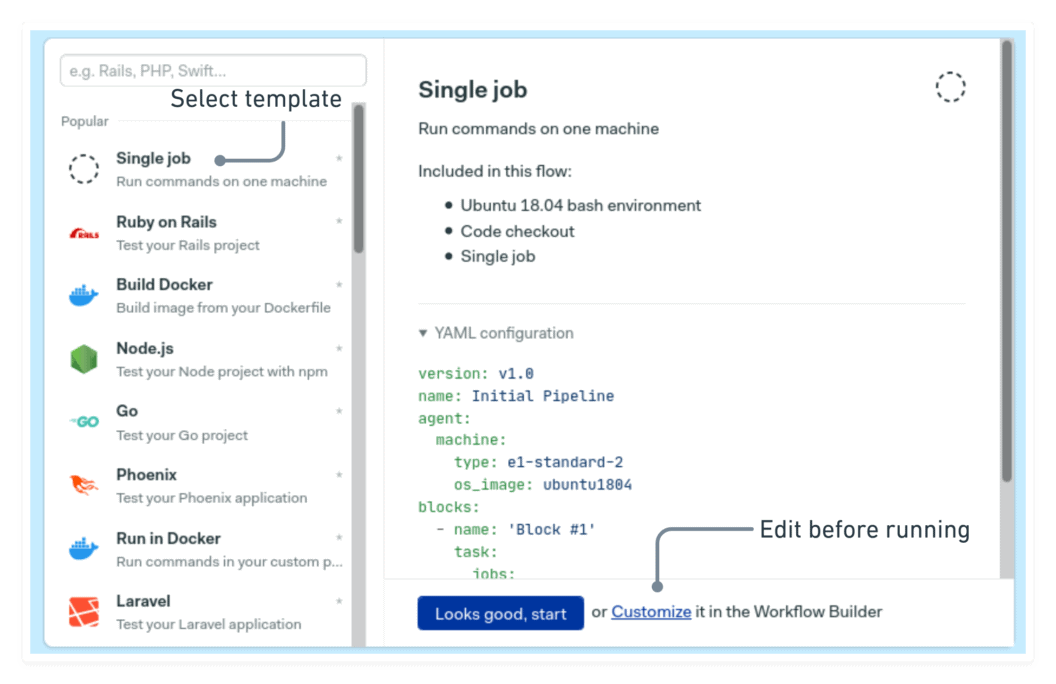
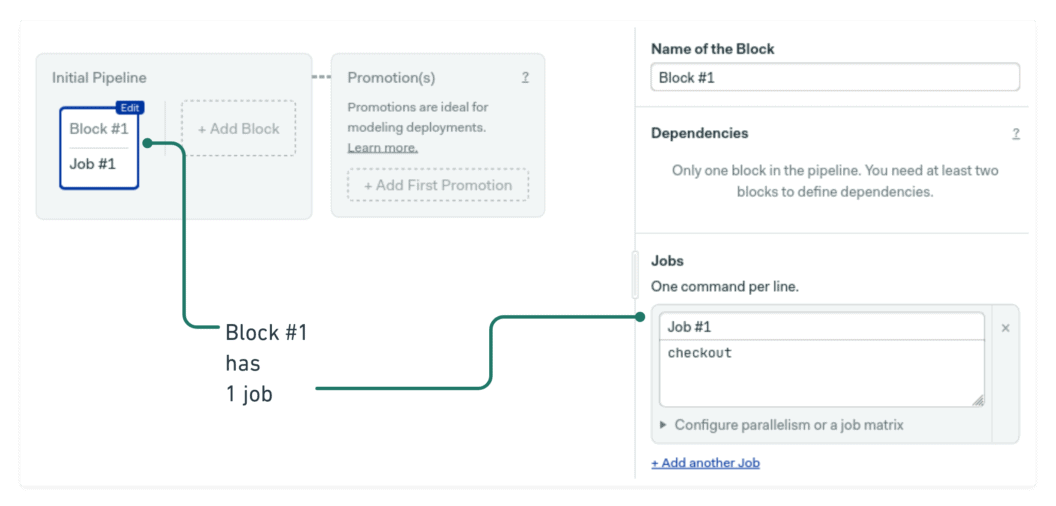
You will reach the workflow builder, where you can configure the jobs in the pipeline.
We’ll create a CI/CD workflow consisting of two stages:
- Build: a quick build stage to download dependencies and run some tests.
- Deployment: generates the Docker image and pushes it to your private ECR registry.
Build job
The very first job in the pipeline will have the following commands:
sem-version ruby 2.7.3
checkout
cache restore
bundle install
cache store
The two lines at the top, sem-version and checkout, set the active Ruby version and clones the repository. The last three lines then install and cache the Gems (dependencies) in the Semaphore cache.
Test job
Next comes some tests. Use the button to create a new block. Open the prologue on the right pane, and in go the following commands. The prologue is always executed before every job in the block.
sem-version ruby 2.7.3
checkout
cache restore
bundle install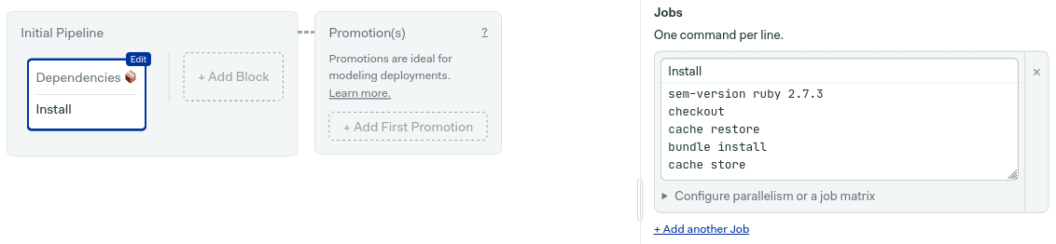
Then, add the test command:
bundle exec rspec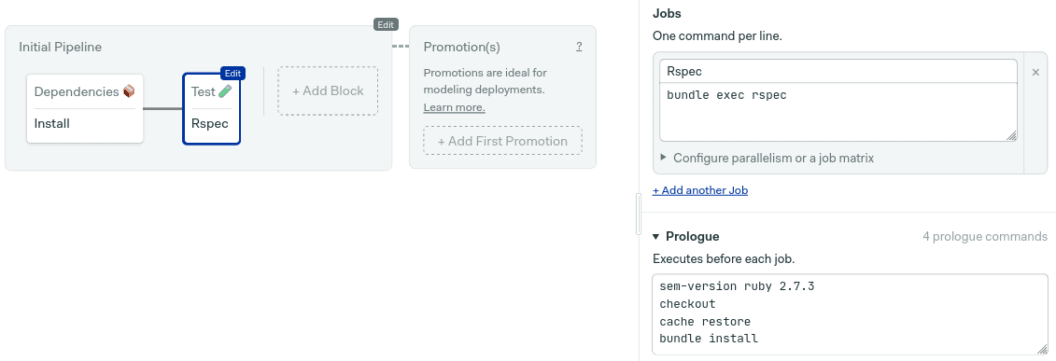
The next step is to generate the Docker image.
Setting up automatic deployments
The Docker build process starts by downloading the latest image stored in ECR; this lets Docker reuse layers, speeding up the build. Then, we build the new image and tag it as latest
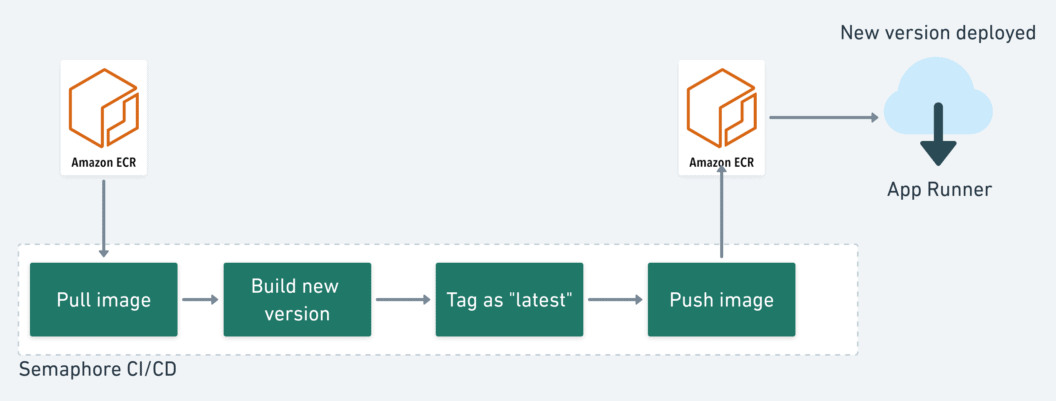
Finally, deployment is triggered after pushing the image to the private ECR registry.
Deployment Pipeline
The CI pipeline already tested the application. Now we’ll create a second pipeline build and deploy the new image.
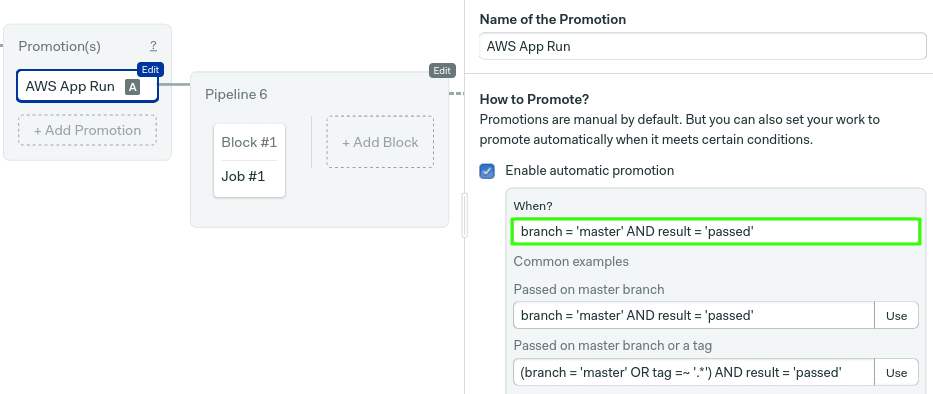
To create the continuous deployment pipeline, use the add promotion button. Then, check “enable auto-promotion.”
By default, promotions start when all tests pass on master branch. Check the conditions reference page to see more options.
The deployment block should have the following commands:
checkout
aws ecr get-login --no-include-email | bash
docker pull "$ECR_IMAGE":latest || true
docker build -t "$ECR_IMAGE":latest --cache-from "$ECR_IMAGE":latest .
docker push "$ECR_IMAGE":latest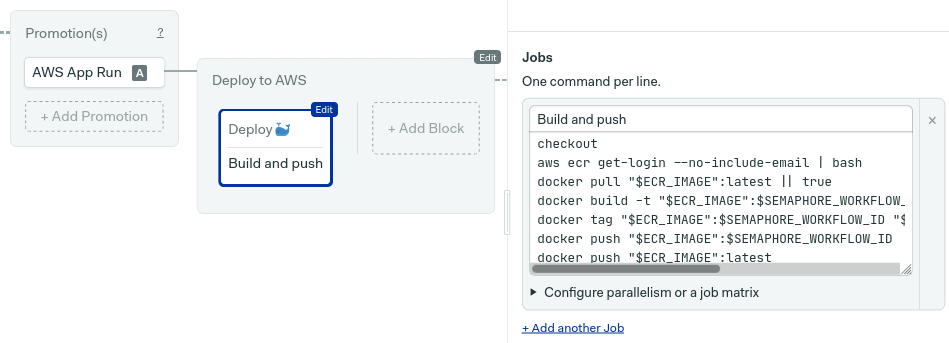
If you’ve used Docker before, you’ll recognize the docker build and docker push commands. The only new thing here is aws ecr get-login. As the name suggests, this command grants access to the ECR private registry.
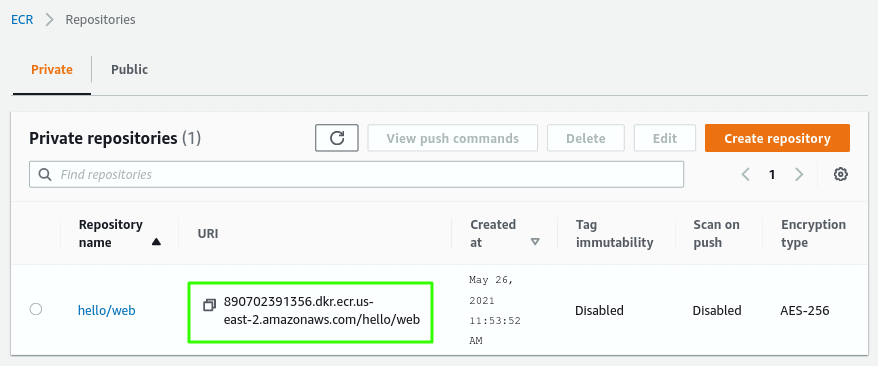
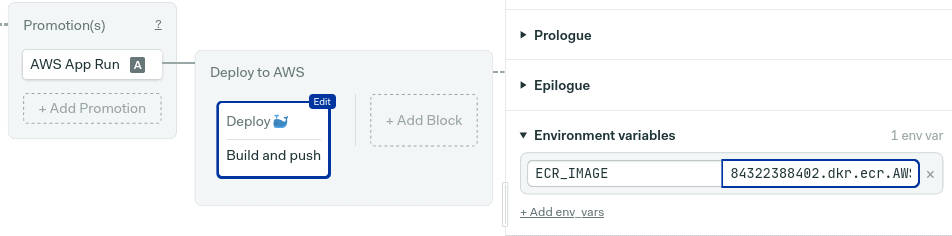
Open the environment variables section and create one variable named ECR_IMAGE pointing to your ECR URI. ECR addresses are created with this shape:
AWS_ACCOUNT_ID.dkr.ecr.AWS_REGION.amazonaws.com/APP_NAME/SERVICE_NAMESo, for example, if your account id is 123456 and your default region is us-east-2 (Ohio), then the ECR address is:
123456.dkr.ecr.us-east-2.amazonaws.com/hello/webYou can always confirm the URI in the ECR console.
The environment variable should have the address of the ECR registry associated with the application.
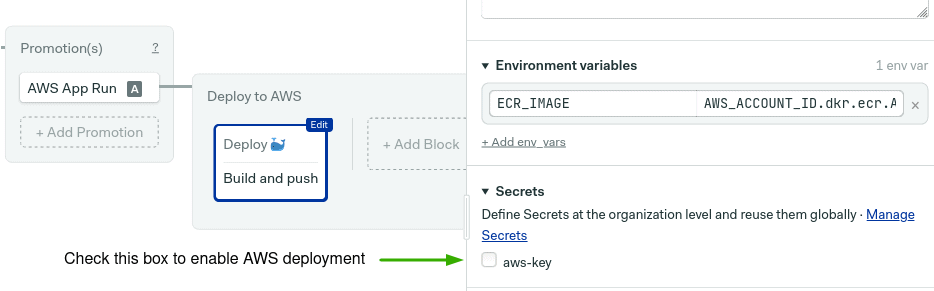
Next, enable the aws-key secret you created earlier, you should find it in the secrets section. This will import the access keys so the job can authenticate with AWS.
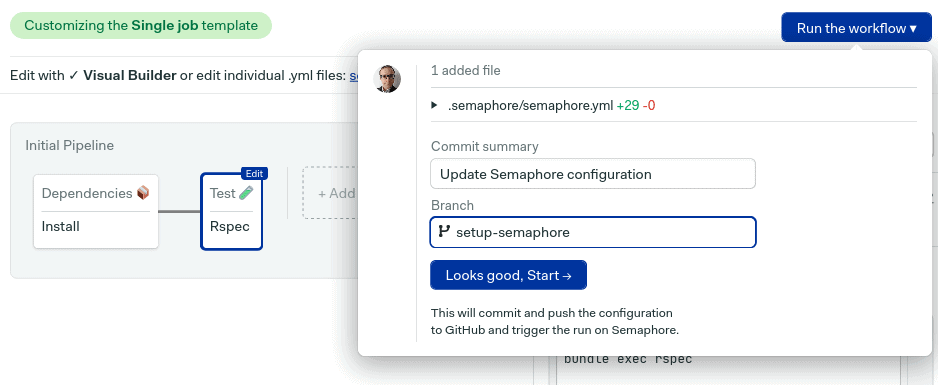
Finally, click on “run the workflow” and then looks good, start.
Depending on the conditions set in the auto-promotion, you might need to click on the button to start the deployment.

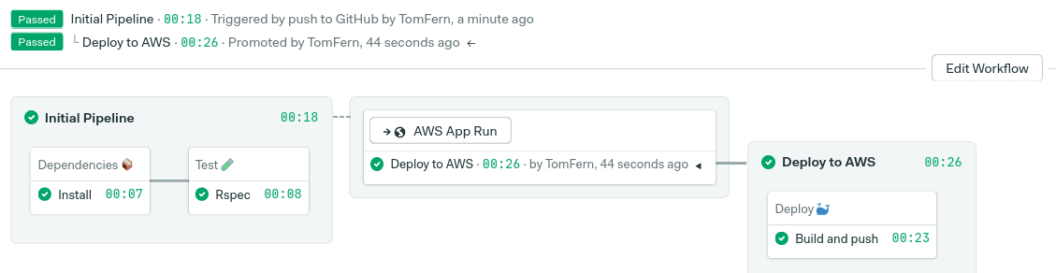
All done, hopefully everything is green and the deployment has begun.
Next steps
Deploying an application on App Runner is straightforward. As long as you have a working Dockerfile to build images, you can run any HTTP application.
We’ve covered building Docker images before, so check out these resources to learn how different languages work inside containers:
- Dockerizing a Node.js Web Application
- Dockerizing a Ruby on Rails Application
- Dockerizing a Python Django Web Application
- Dockerizing a PHP Application
- Dockerizing a Java Play Application
- Dockerizing Elixir and Phoenix Applications
Conclusion
App Runner is a service sitting in the space between AWS Fargate, Lambda, and ECS. It focuses on developer productivity and is a great way to get started with containerized applications.
Want to discuss this article? Join our Discord.